Welcome to my gloss tutorial. You're going to learn how to add a curved gloss effect to your signature/avatar. This is the final product of what you will be learning to create:
 Step One:
Create a new document (or use art you previously made), I'm going to size mine at 150x150 for this tutorial. If you are using a blank document for your gloss go ahead and fill the document using the paint bucket tool with any color you'd like, I'll be using black. At this point you should have a plain colored square. (Or your signature/avatar).
Step Two: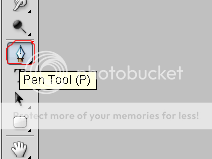
Click the Pen Tool on the tool bar. This is a very important tool in adding curved gloss.
Step Three:
With the Pen Tool selected click the bottom left corner of the square/rectangle and drag the selection up in till the line is lined up with your square/avatar.
Step Four:
Now with the pen tool still selected click the top right corner of the square/rectangle and draw this selection up like in step three. You should now see a nice curve on your selection. If you don't like your curve go back and make the lines shorter or longer on step three and four in till you like the curve.
Step Five:Okay, the hardest part is over. With the pen tool still selected click above the signature/avatar you are adding gloss to (some where in the above grey area, and then click once more on the bottom left corner. Your screen should now look something like this:
 Step Six:
Okay, we're almost done. This part may be a little tricky. Click "Paths", right click on the space around "Work Path" and choose "Make Selection". Under rendering put "Feathered Radius" at 0 and make sure the "Anti-aliased" box is checked.
Step Seven:The lines in the signature/avatar should now be a selection. Now select the gradient tool and make sure that your colors are both white (so long as the foreground color is white you should be fine). Click the drop down arrow next to the gradient at the top that goes from white to transparent. It should look something like this:

Now simple apply the gradient. (Do this by clicking above your signature/avatar and dragging the selection down.) Play with this in till it looks good. And your finished! This is the finished product: